Posts

Navigating Parenting While Working from Home
I have recognized during the time that I’ve been teleworking that my two-year-old goes through periods in which he turns into a wrecking ball. He will be playing appropriately, then the toys start crashing and flying as he is wrestling or bouncing off objects. I have had to step back to determine the need or intention of the behavior because it can be excessive and disruptive at times. I know his world has been flipped since staying home with me full-time. He has grieved the loss of friendships and caregivers in his own toddler way, causing behavioral changes. When the behavior arises, I also ask myself whether he is tired or is there an emotional need I have not been able to provide him because my time is split.
I have discovered that usually the lower his proprioceptive input is throughout the day, the more I see him seeking that input. The results are rough play, crashing into things, and an increase in defiance and dysregulation. My kid needs activity in which he is pulling, pushing, squeezing, stomping, running, and jumping throughout the day. We cannot be outside all the time because I am attempting to maintain my work schedule, so I have been experimenting with activities that can be done inside that is less likely to result in destruction or injury. I am still trying to find the right balance of alternating quality time with him, providing the sensory outlets he needs, and completing work throughout the day. Like adults, children’s social/emotional/sensory needs can vary day to day. Incorporating sensory activities throughout the day has made him calmer and overall, just a happier kid. He can do some activities independently, allowing me to get work done during that time. I also find that if I can give anywhere from 5-30 minutes of quality time with him periodically throughout the day, I see a decrease in him using negative behaviors to try to engage me. During those quality time moments, I usually incorporate an activity that is sensory related. On the days I am less available due to my schedule, I expect to see an increase in some challenging behaviors. I tend to try to provide more independent sensory input activities on those days.
Kinetic sand has been a miracle for my toddler. It often provides the sensory input he needs in the morning, resulting in a much calmer child throughout the day. He can squeeze, pound, and push it. He enjoys dinosaurs and trucks, so we have been using those in the sand as well. I have offered pipe cleaners and beads for him to put in the sand as well. He will string the beads on the pipe cleaner to make snakes and trees to put in his sand tray. We will label colors, shapes, and letters in the sand while we play If I want to add an educational component. Naturally, the activity also helps with fine motor skills. We have used shovels, spoons, cups, and tweezers to manipulate the sand or pick up objects. This activity can be done independently or with the caregiver. Everyone’s sensory needs are different, so sand may not be every kid’s cup of tea. Here is a link of other fillers that can be used if you don’t have kinetic sand or it’s not suitable for your child https://littlebinsforlittlehands.com/our-favorite-sensory-bin-fillers/
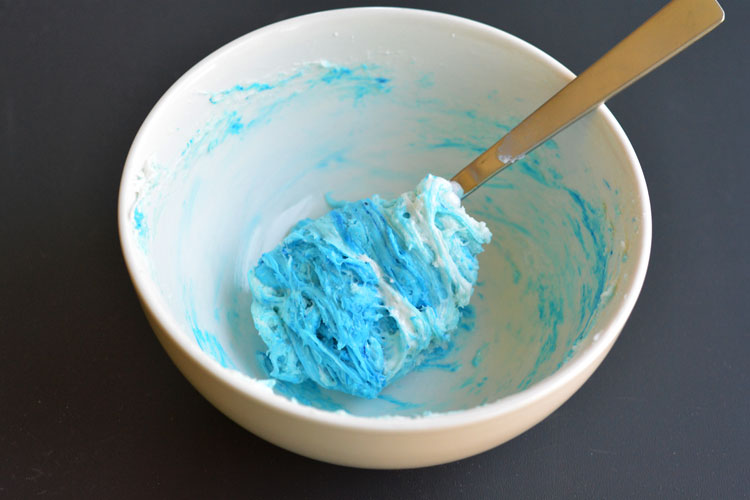
Sensory Activity: Marshmallow Play Dough
What child wouldn’t love playing with squishy, moldable, and even edible play dough? This is a great tool for sensory exploration and fine motor development! Try using cookie cutters and other molds to make shapes out of the dough, or just make shapes with your hands!
Make Marshmallow Play Dough with the super easy recipe below!

Ingredients
- 6 Large Marshmallows
- ¼ cup Corn Starch
- 2 tsp coconut oil
- 12 drops Liquid Food Coloring
Add the marshmallows, corn starch and coconut oil to a microwave safe bowl. Microwave on high for 30 seconds. Then add the food coloring to the marshmallows or the oil. Don’t add it to the corn starch or you’ll have a harder time getting a consistent color when you mix it together. Stir it with a spoon to get all of the ingredients combined. When it gets too hard to stir with a spoon, you’ll need to use your hands to kneed it to finish the job.
It might be hot from the microwave, so check the temperature before giving it to the kids to kneed. If it’s too sticky and doesn’t combine, try adding another big teaspoon of cornstarch to see if that helps. If it’s still too sticky, add about 1/4 teaspoon of coconut oil, and squish it all together. Play with it on a non stick surface, such as parchment paper taped to the table or a silicone baking mat.

There you have it! Have fun and remember, this dough is edible–although it doesn’t taste as sweet as you’d think because of the marshmallows. Don’t worry if your child taste tests, they probably won’t eat much.
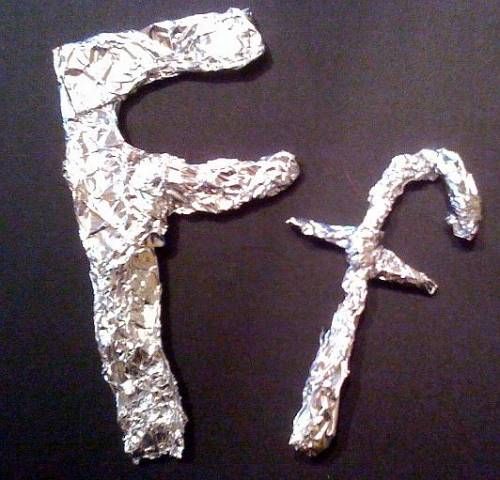
Letter Recognition Sensory Activity
Shaping aluminum foil into letters is an activity that uses the tactile sense to build children’s knowledge of letter shapes. It also includes a fine motor component to support the development of children’s finger muscles.
Get kids thinking of how they would bend and fold the foil to make the shapes of certain letters. This fosters their problem solving skills and creativty!
This aluminum foil letters activity is simple to set up and will be enjoyed by kids who prefer hands-on and visual learning!
Sensory Activity: Water Beads
Water beads are the perfect (almost mess free) answer for anyone looking for a sensory activity (and when we say anyone, we mean children and adults)! Water beads promote learning and development in all content areas of the classroom. From fine motor exploration to science, color, sensory, and creative art – the ideas of how water beads can be used is endless. We here at PRC decided to try out some water beads just for fun and fell in love with their relaxation and stress relieving attributes. Check out the process for making them below. We bought Jelly Beadz from Amazon (roughly 1 pound or 30,000 beads for $18).
You will need:
Water Beads, Water, a medium to large tub, paper towels
- Start by pouring a handful of beads into the tub you are choosing to make your beads in (remember, even though it may not seem like many beads, once they grow they could very well outgrow your tub! That’s where the paper towels come in handy.
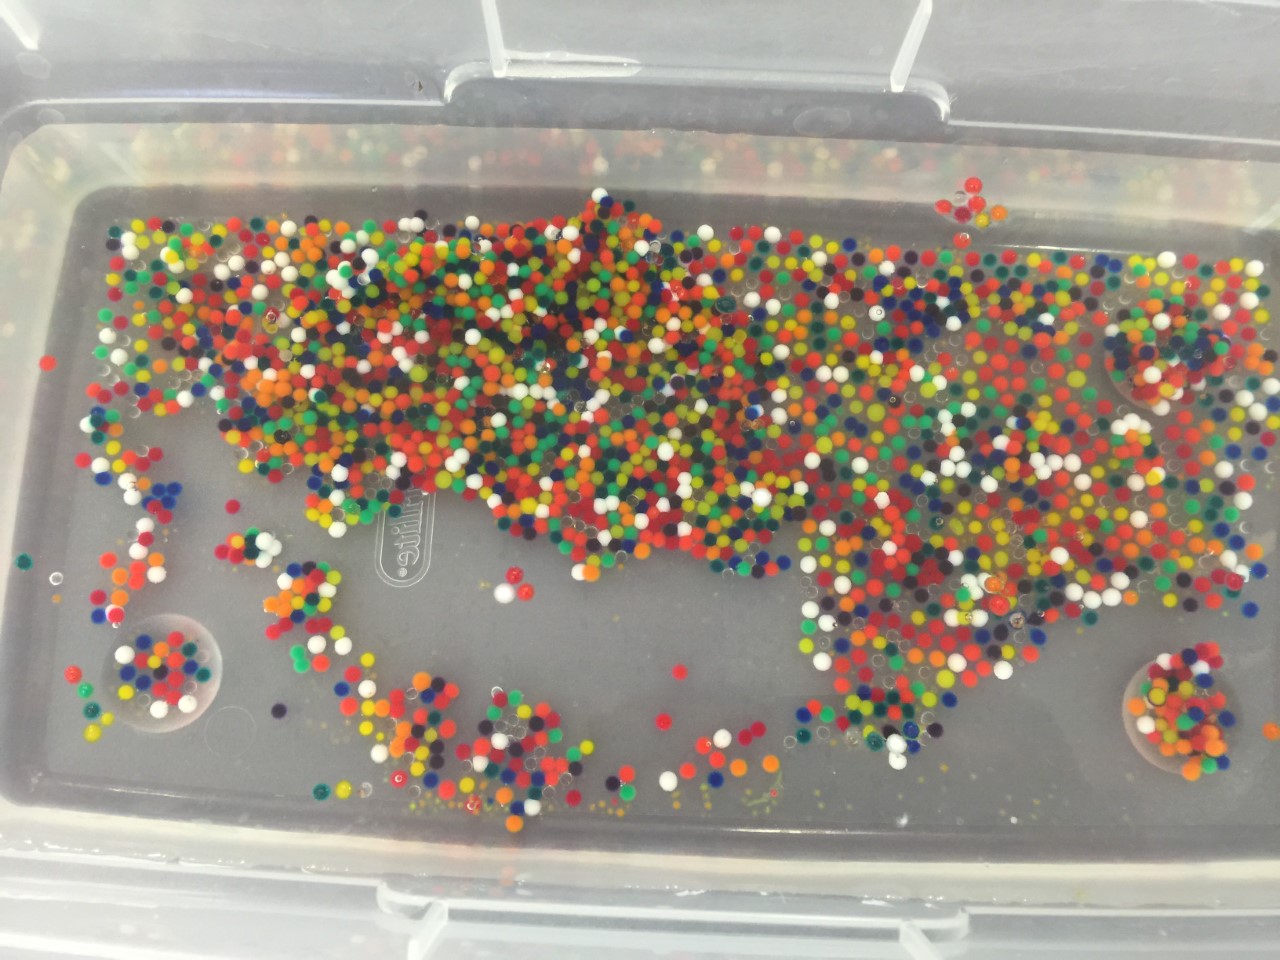
2.Fill your tub about halfway with water.
3. Let the tub sit overnight or for at least 4 hours while the beads absorb the water. Check to make sure there isn’t much excess water in the bottom of your tub. (If so, they may need more time or the water can be drained with a strainer).
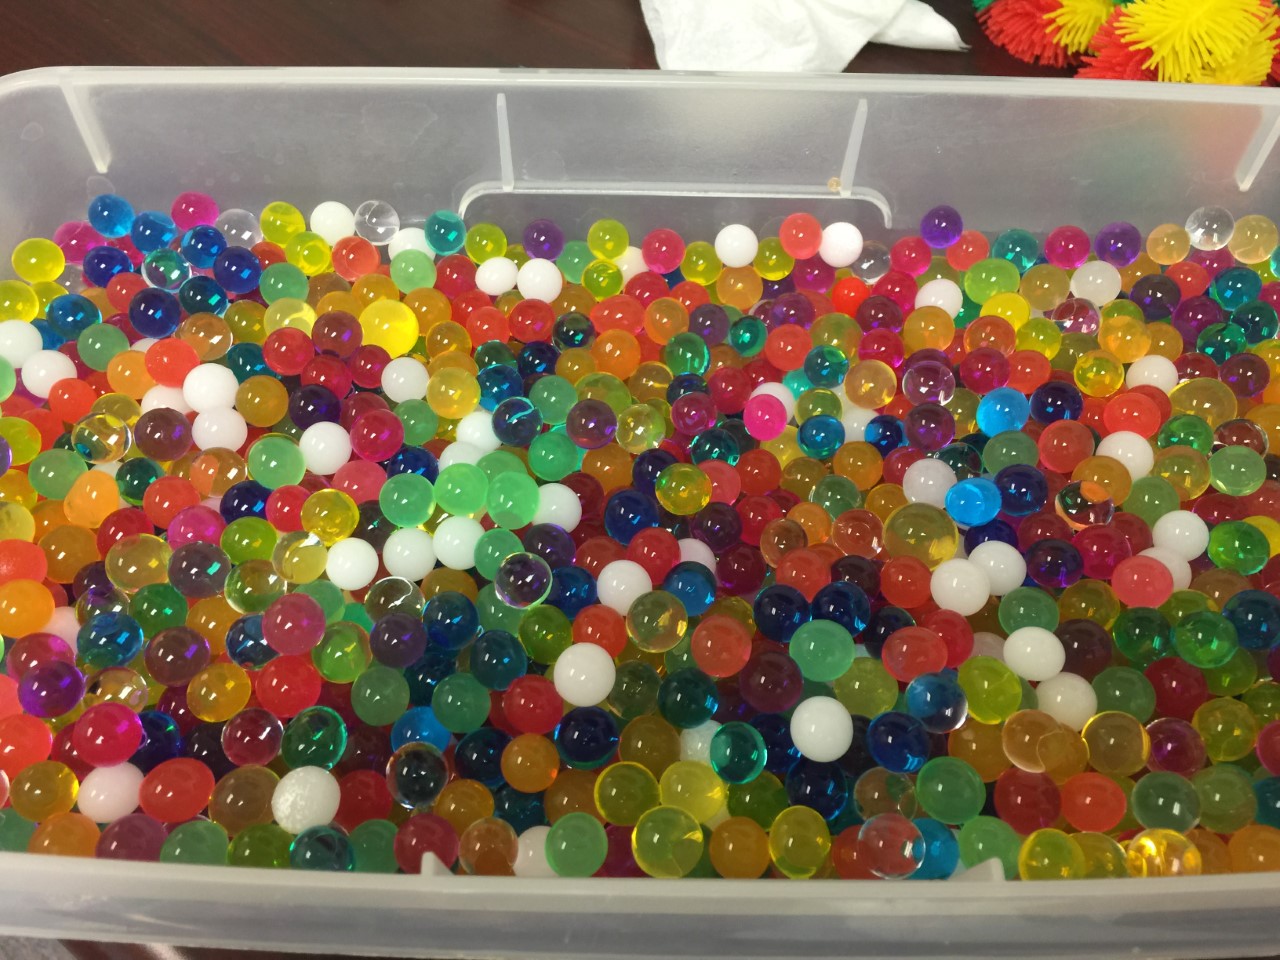
4. Start playing!
That’s really all there is to it! Remember, these beads are not edible! They will last roughly 3 or 4 days before needing to be tossed or separated onto paper towels to dry out. Note that these beads will not release water but the water will evaporate and they will return to original size. They can be used again later!