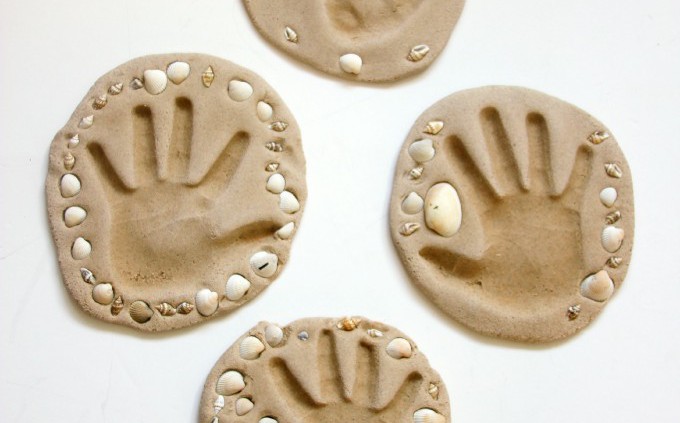
Summer 2016 Keepsake: Sand Handprint
Make these awesome handprint keepsakes using this simple, homemade sand clay recipe for long-lasting memories and sweet gifts. Add shells and treasures collected on beach visits too, to incorporate holiday memories which will last.
HOW TO MAKE SAND CLAY RECIPE:
2 cups sand
1 1/2 cups plain flour (all purpose)
1 cup warm water
1 1/4 cups salt
Mix together the sand, flour and salt in a large bowl and slowly add the warm water , mixing as you go with a large spoon. This is a dough recipe and as with all doughs, the measurements of dry ingredients can really make a difference to the stickiness/ dryness of the finished dough, so add the water carefully and just balance it out if it feels a little too sticky by adding some more flour or sand.
Once it is all combined, take it out of the bowl and begin to knead it on a lightly floured surface. It will take less than a minute to come together into a soft and pliable ball very similar in feel and consistency to play dough or salt dough.
Proceed to roll, cut and air or oven dry the sand clay in the same way as salt dough from this point forward.
Split the ball into the number of pieces you’ll need(one part for each child) and then roll out the dough one by one, into a circular shape about 2 cm thick. It’s a good idea to roll this directly onto a large baking sheet so that it won’t need to be moved. It is even better to roll it onto baking parchment on the baking sheet if you have it available.
Once the dough is rolled into circles, each child can push their hand into the centre of their piece, make sure to push each finger down firmly, one by one, using another hand on top. Then carefully pull hands off to reveal the handprints in the dough.
Using small shells from beach trips and party craft supplies, decorate around the borders to turn these into real beach keepsakes treasures!
Put them straight into the oven at approximately 250 F for 4 hours. The sand dough will dry hard at differing times depending on your oven and, importantly, the thickness of the dough discs.
It’s important that they are not too thick or else it takes too long for them to dry hard and they can remain a little doughy in the middle. If you find they are hard on the top but not underneath, take them out and gently turn them over, then put them back into the oven for another hour or two to harden the underside.
You can try adding a clay glaze over the top to seal them and/or make them shiny, but I like the feel and look of them as they are as they seem so realistic!


Leave a Reply
Want to join the discussion?Feel free to contribute!